How to create in-app Notifications in Model-driven apps (MDAs) using Power Automate

In this article we will see how we can enable and configure ‘In-app notifications’

Full technical documentation: Microsoft Learn

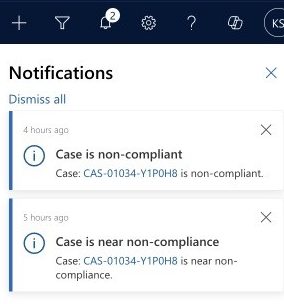
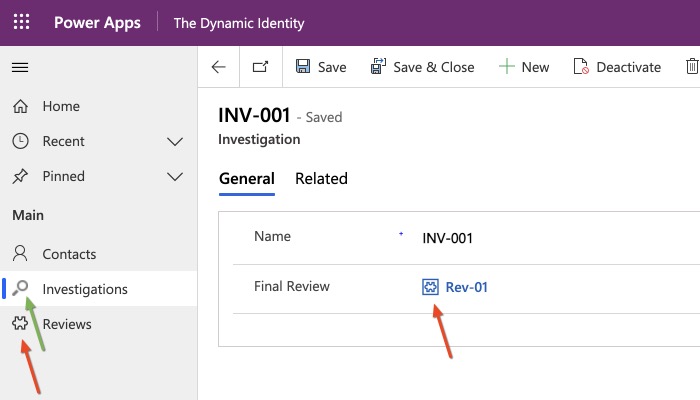
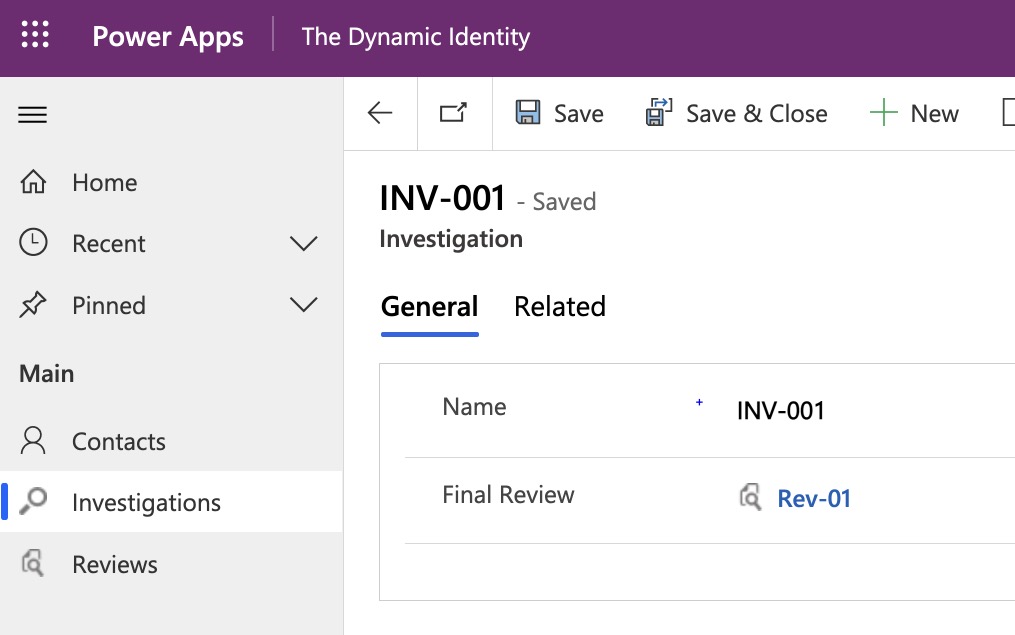
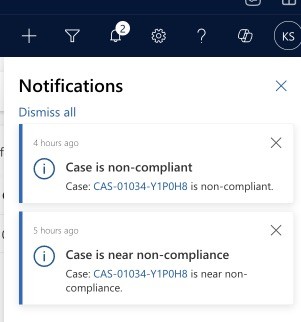
Final outcome: In-app notifications (as an alternative to tasks/emails):

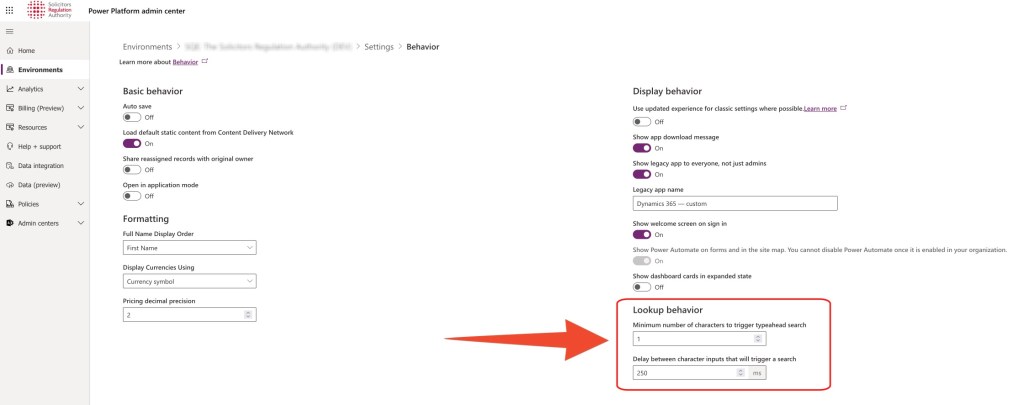
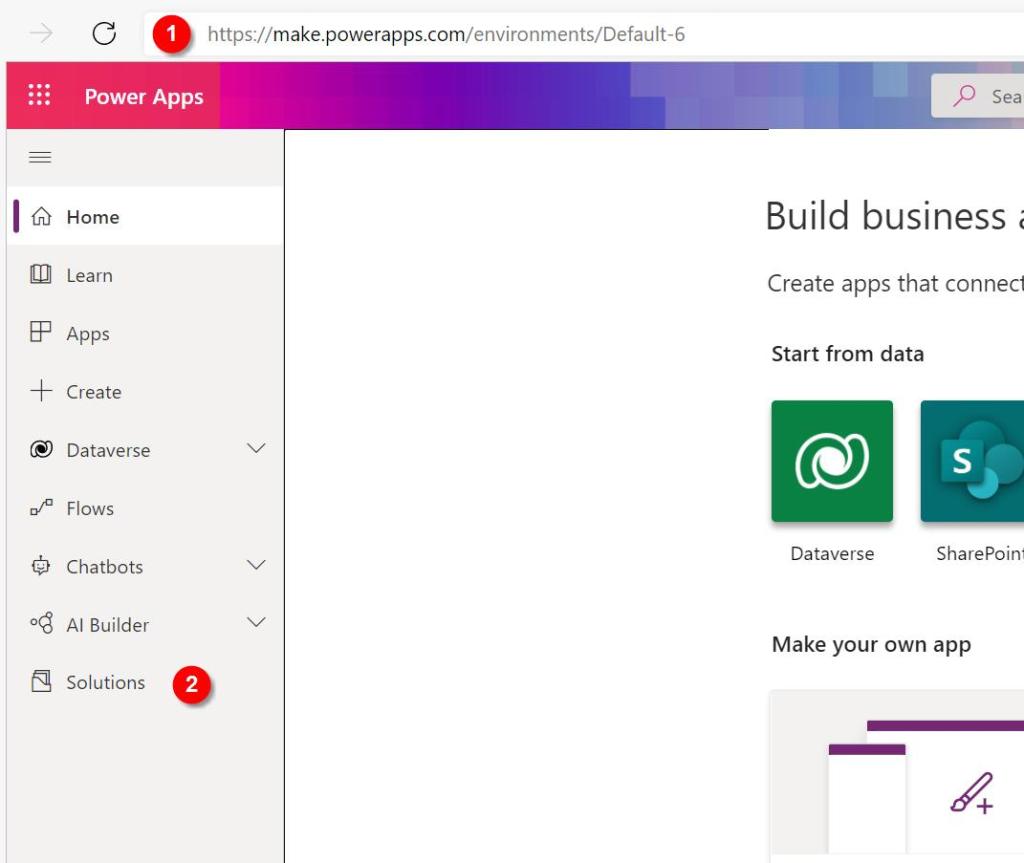
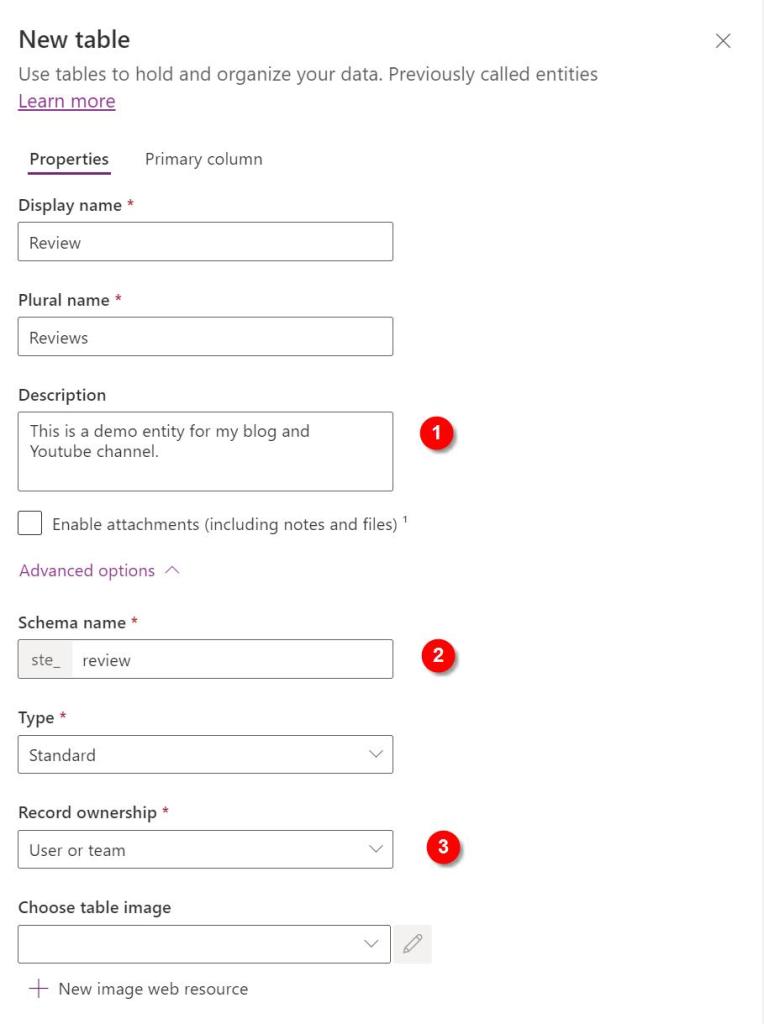
1- Enable ‘In-app notifications’ for your MDA (Model-driven App).

Example scenario: We want to notify a CRM user that a case assigned to them is nearing non-compliance or has reached that state. We want to include a link to the relevant case so that the user can actually use the notification.

Steps (see screenshot below)

1- Enhanced SLA’s will create a flow for us with the correct trigger (as the ‘Action’.

2- We retrieve the case

3- Create the notification (Action: Add a new row)

4- Body: this is where we want the link to the record to show

NB – you do not need to worry about the environment-specific URL – see this entry here for how to construct that in other scenarios.

Markdown format allows you to easily link to records in CRM – here are the 3 items to consider:

[LINK DESCRIPRIO](?pagetype=entityrecord&etn=incident&id=GUID)

BLUE – this will be the text that appears as a link, in the screenshot below I have used the Case Number

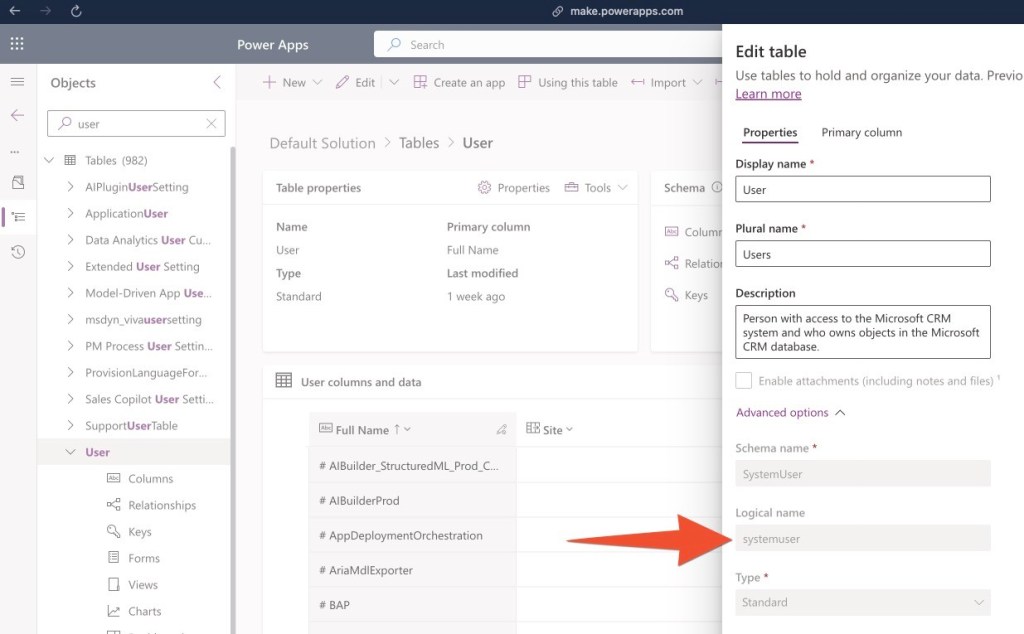
RED – make sure this matches the entity which you are linking to

YELLOW – GUID of the record you want to open

In the screenshot below you can see the new designer: steps can be copy-pasted! (finally an improvement from Microsoft)

And again – the final result:

How to construct a Dataverse record’s dynamic URL with Power Automate

This post shows you how to use the ‘uriHost’ feature on a record’s odata.id to dynamically get the record’s environment URL.

Sometimes it can be required/useful to include a URL to a record, for example when creating a task/email that is regarding the parent record but the action is on a child record.

As far as I can tell, a ‘dynamic record URL’ (as we have them in CRM workflows) is not available via Power Automate.

Yet another Microsoft 'feature'.

This means we have to concatenate the URL ourselves. The most important part is to get the environment variable correct, so that the flow can be deployed to other environments. The building blocks are:

1- ‘Get’ the record for which you want to build the URL (you might already have this via the trigger)

2- Extract the environment URL

Using a ‘compose’ action, manipulate the data.id from the target record:

uriHost(body('Get_a_row_by_ID')?['@odata.id'])

3- Concatenate the URL

BLUE – This is the environment URL extracted in the previous step

RED – This is the table in which the record resides

YELLOW – This is the record you want to link to

concat('https://',outputs('Compose_-_uriHost_-_environment_url'),'/main.aspx?pagetype=entityrecord&etn=incident&id=','INSERT GUID HERE')

This is what the output looks like when you run the flow.

How to set a Dataverse lookup with Power Automate

When setting a Dataverse lookup via Power Automate, use the table’s logical name and append an ‘s’ to it.

When creating/updating a record in Dataverse (Dynamics CRM) we often need to set lookups.

To set a lookup, we need to pass in the GUID of the record and tell Power Automate which table to find the record in.

For this we use the table’s logical name and append an ‘s’ (NB – this is sometimes referred to as the ‘entitysetname’)

Table Logical Name + s
Another typical Microsoft 'feature' - why not use the schema name or the logical name.... No, instead, let's make up a random rule.
How to find the ‘Logical Name’ for any table

In the example below I am assigning an in-app notification to a CRM user – the concept applies to all entities.

The ‘Users’ table’s logical name is ‘systemuser’, we append and ‘s’ and make it ‘systemusers’, then, in brackets we pass in the GUID of the relevant user, here the ‘Caseworker’ (choose the option with the (Value), this contains the GUID).

How to add icons to a custom table in Dynamics CRM

In this post we are looking at where to find icons and how to add them to a custom tables in Dynamics CRM.

Check out the YouTube video to take you through the process step-by-step.

There are a couple places where the icon of a table shows in the system, these are:

  • the navigation of a model driven app,
  • a lookup to that entity

So, let’s first talk about the technical requirements for an icon:

  • dimensions: 16×16 pixel
  • format: svg
  • less than 10kb
  • no padding
  • preferably no background

N.B. other format are permitted, but svg offers the best squality

A few great and free websites are:

However, personally, I prefer “Metro Studio” by Syncfusion https://www.syncfusion.com/downloads/metrostudio

You will have to sign up download and install the software first. However once that is done, it will significantly improve the speed at which you can find and download items in the future, as it remembers your settings and let you save items into projects from data retrieval.

Set the colour to black (#FF000000) or dark grey, at least: #FF757474


One advantage of icons8 is that you can customise icons, but adding extra elements to them – just make sure to filter by “Simple small”, as this only shows icons that are available in 16×16 pixels.

https://icons8.com/icon/set/icon/small

Head over to the make.powerapps.com UI. First, we will need to add the icon as a new webresouce to CRM – go to your web resouce solution, click on new > more > web resource and then upload the png like this – consider a naming pattern to stick to, such as entityname_icon_dimension:

In order to add it to a custom table, navigate to the relevant table, select properties and then add the image there:

That’s it, click on save and reload your MDA – voila!

How to create a new table (previously: custom entity) in Dynamics CRM- things to watch out for!

This post will outline the most important things to consider when creating a new table (formerly: custom entity) in Microsoft Dynamics CRM.

Check out the Youtube version.

> Always create entities within a solution

  • Navigate to https://make.powerapps.com/ and sign in
  • Go to “Solutions”
  • Create a new solution or use an existing one
  • Create a new “Table” (what used to be called “entity”)

After choosing the name (and plural name):

  • Description: add at least 1 sentence in here – others will thank you later!
  • Schema name: update the schema name to all lowercase letters (and consider if this is a reference data entity, in which case you should prefix it with “ref_”)
  • Record ownership: always set this to “User or team”, there are no advantages to chosing “Organization”, only disadvantages.
  • Other setting:
    • Uncheck all boxes – unless you are certain you will need the feature – these can be checked later if required
    • consider checking the “Audit changes to its data” – this will likely come in handy during development and testing, as it will allow you to better understand what might have caused an error. To safe space, consider turning this off before releasing into PRODUCTION
  • Primary column – Schema name:
    • change the schema name of name field to all lower case
    • leave it as “name” – this helps later to identify the column containing the name.

That’s it, hit save and the new table will be created.

I recommend that you take a look at my checklist for customising a new table:

[WIP – add the link when the post has been pubished]

You might also want to add a custom icon:

[WIP – add the link when the post has been pubished]